Photo Guide
Photography Points
AI accuracy depends heavily on photo quality and which details you capture. More photos = better accuracy.
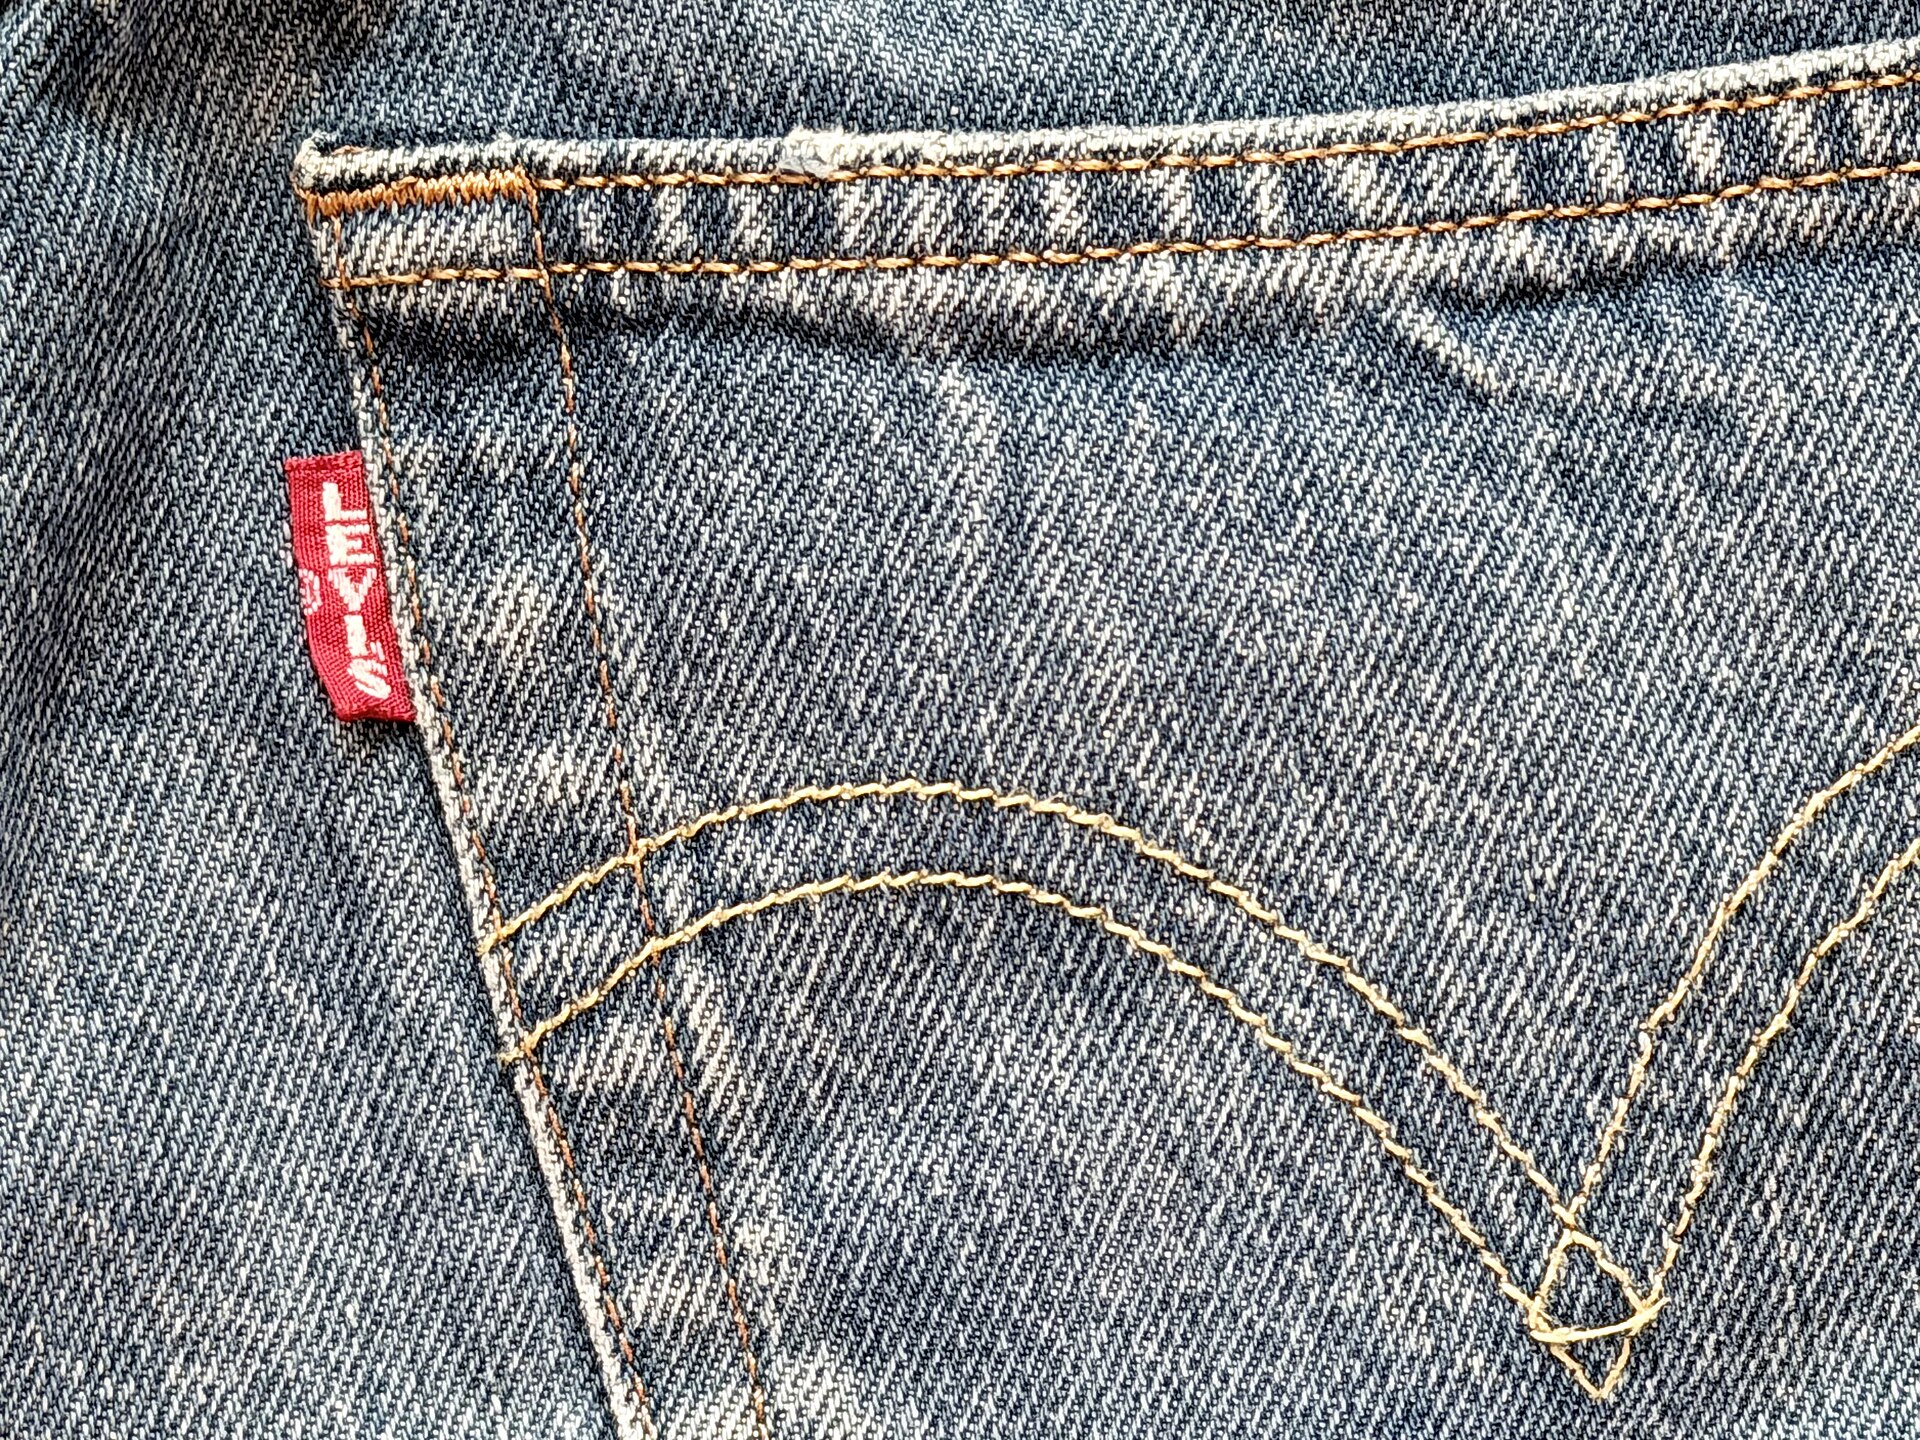
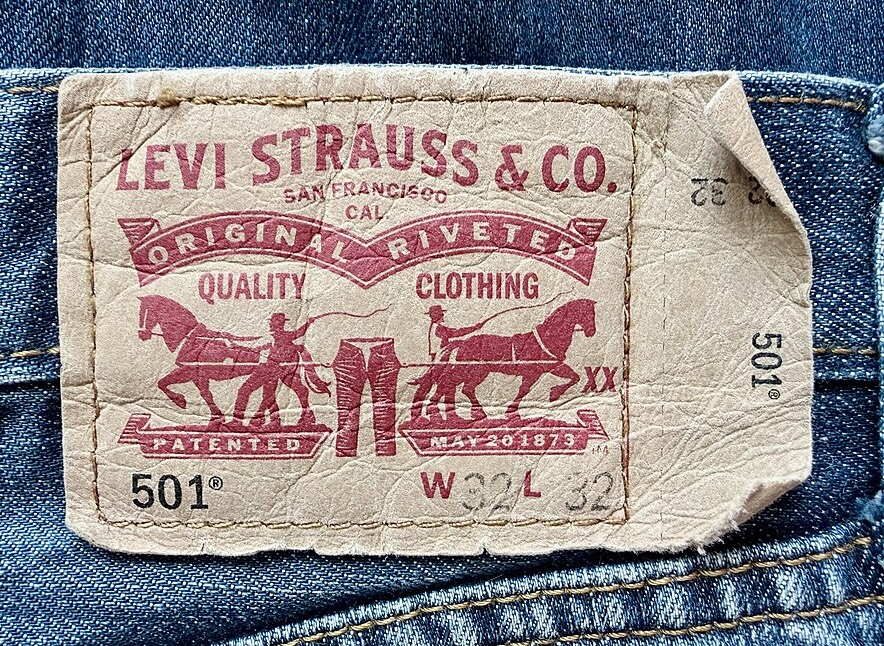
Red Tab
Both sides uppercase "LEVIS" = pre-1971 Big E. Most critical point.
📷 Pull out the tab and shoot both sides close-up. Check focus carefully.
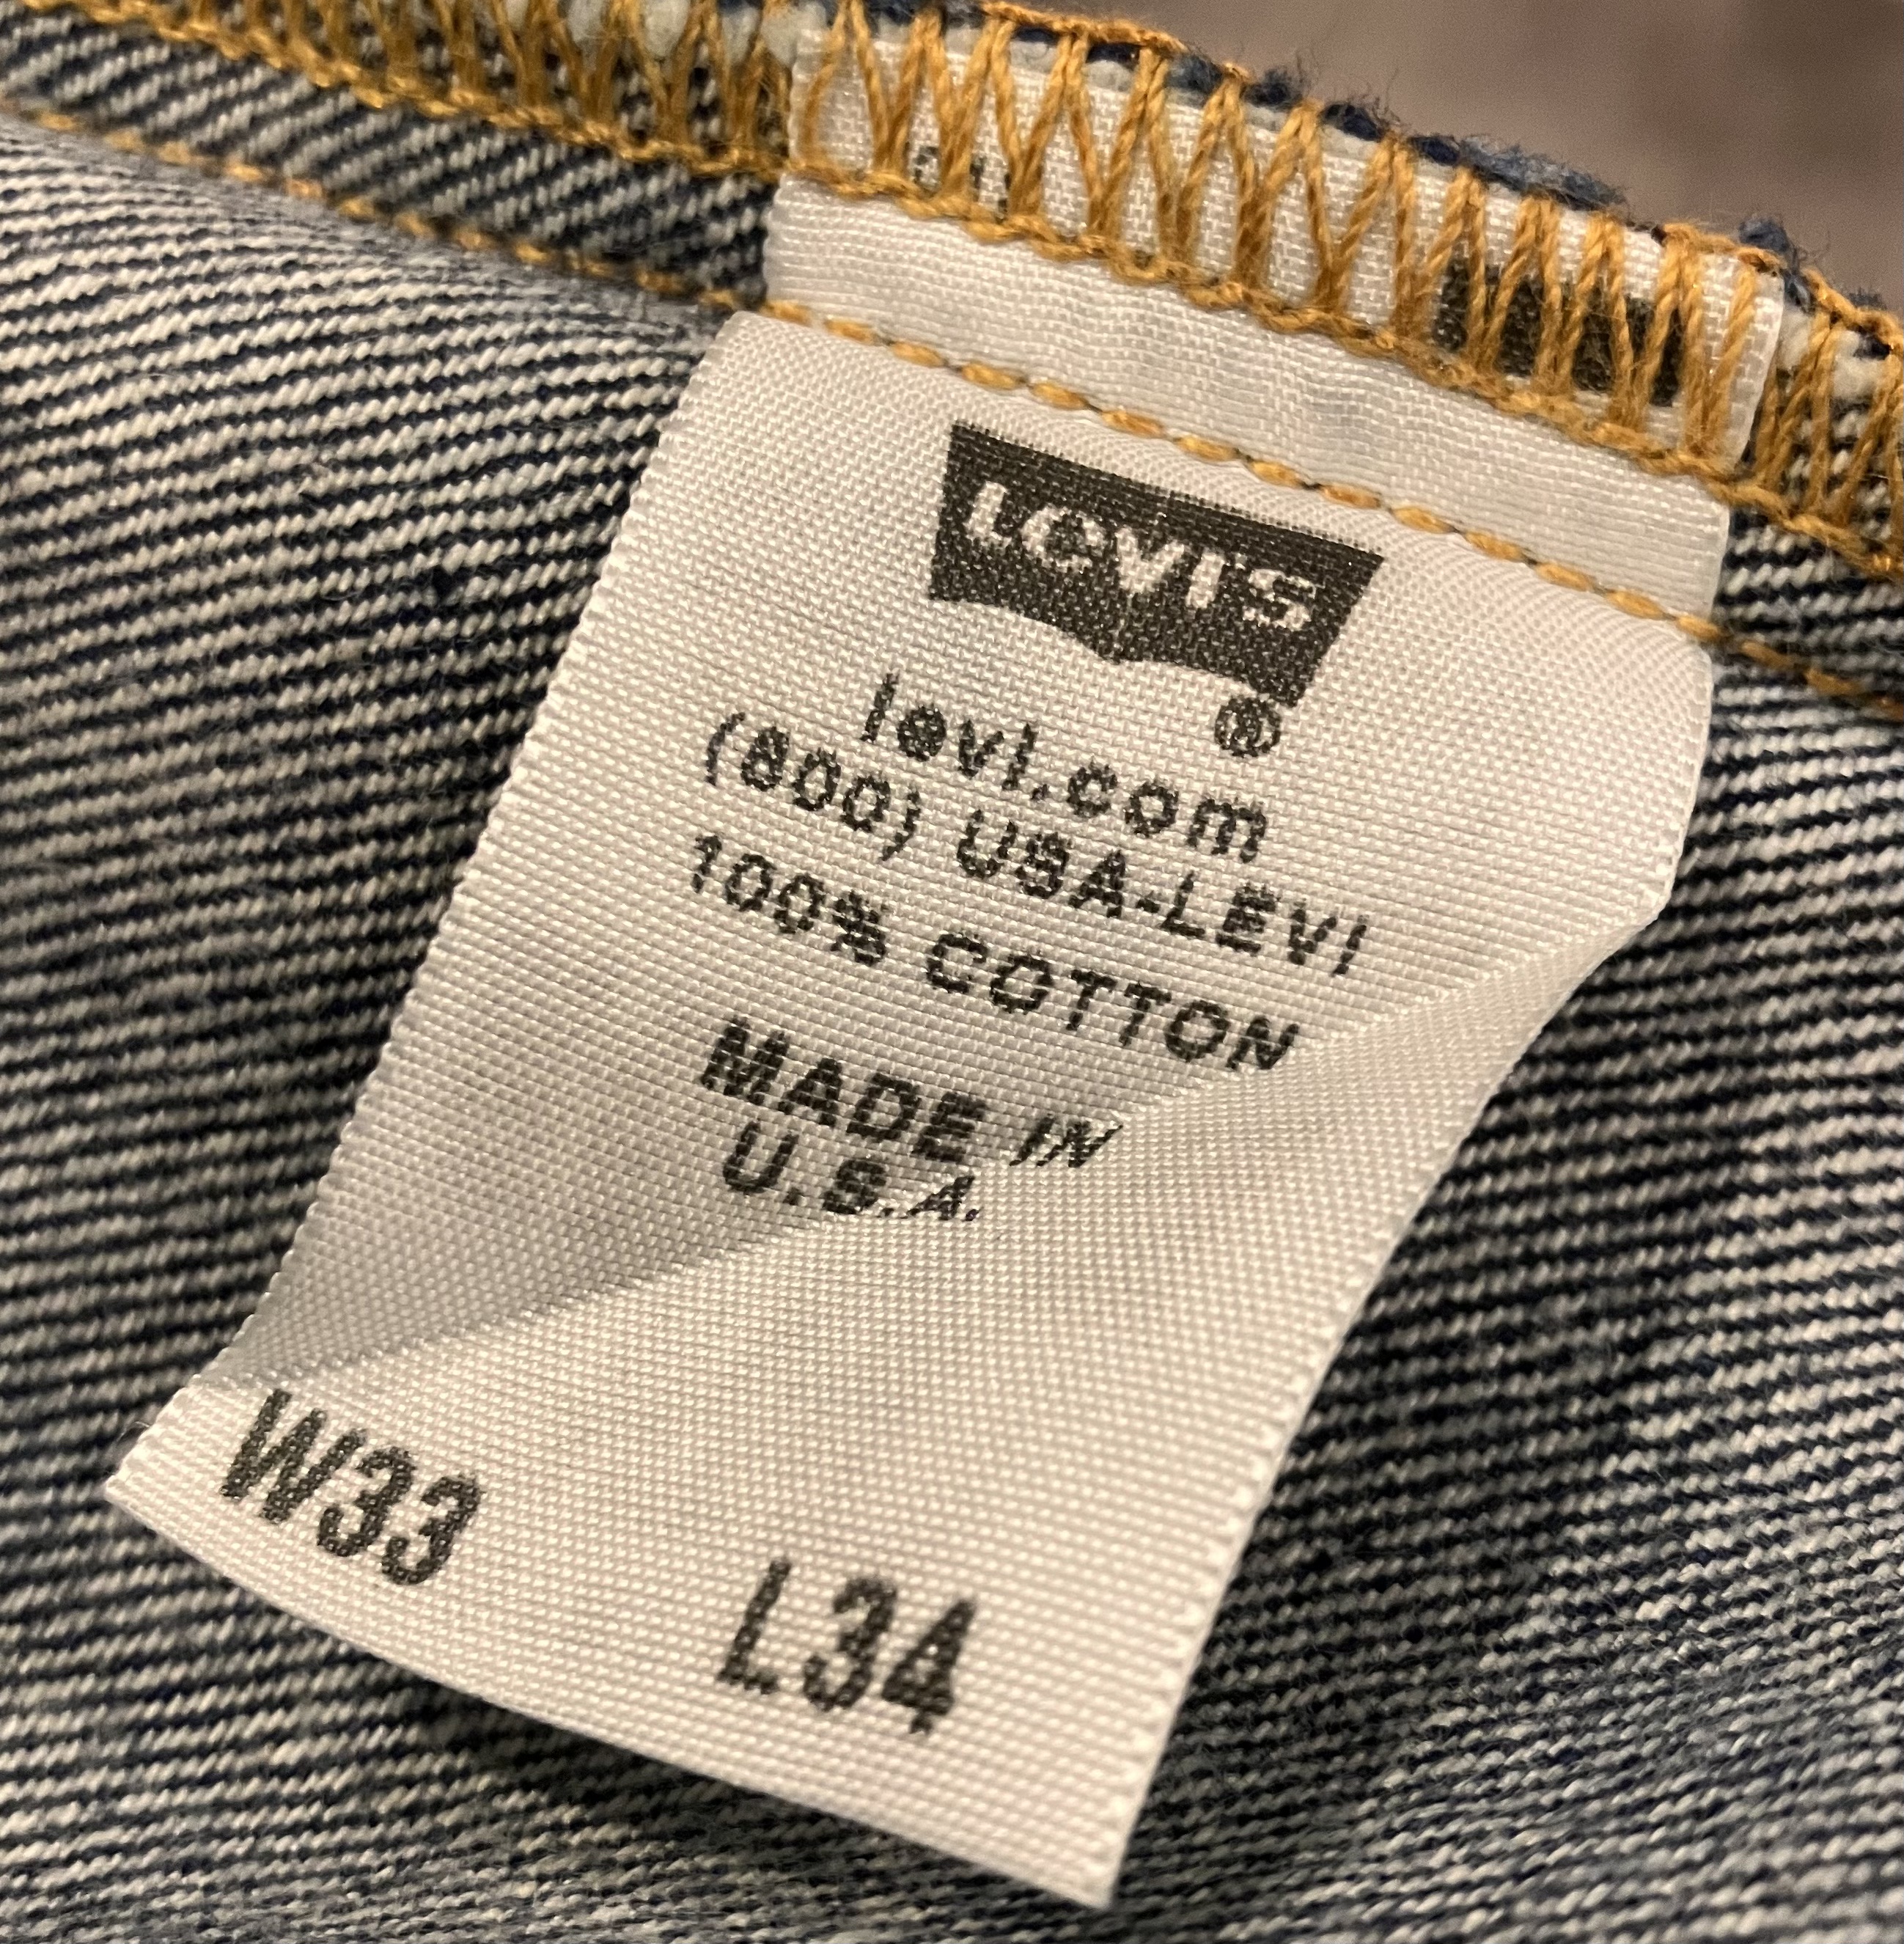
Care Label
No care label = pre-1971 confirmed. One photo divides the era in two.
📷 Shoot the full tag in good lighting. If absent, photograph the inside anyway.
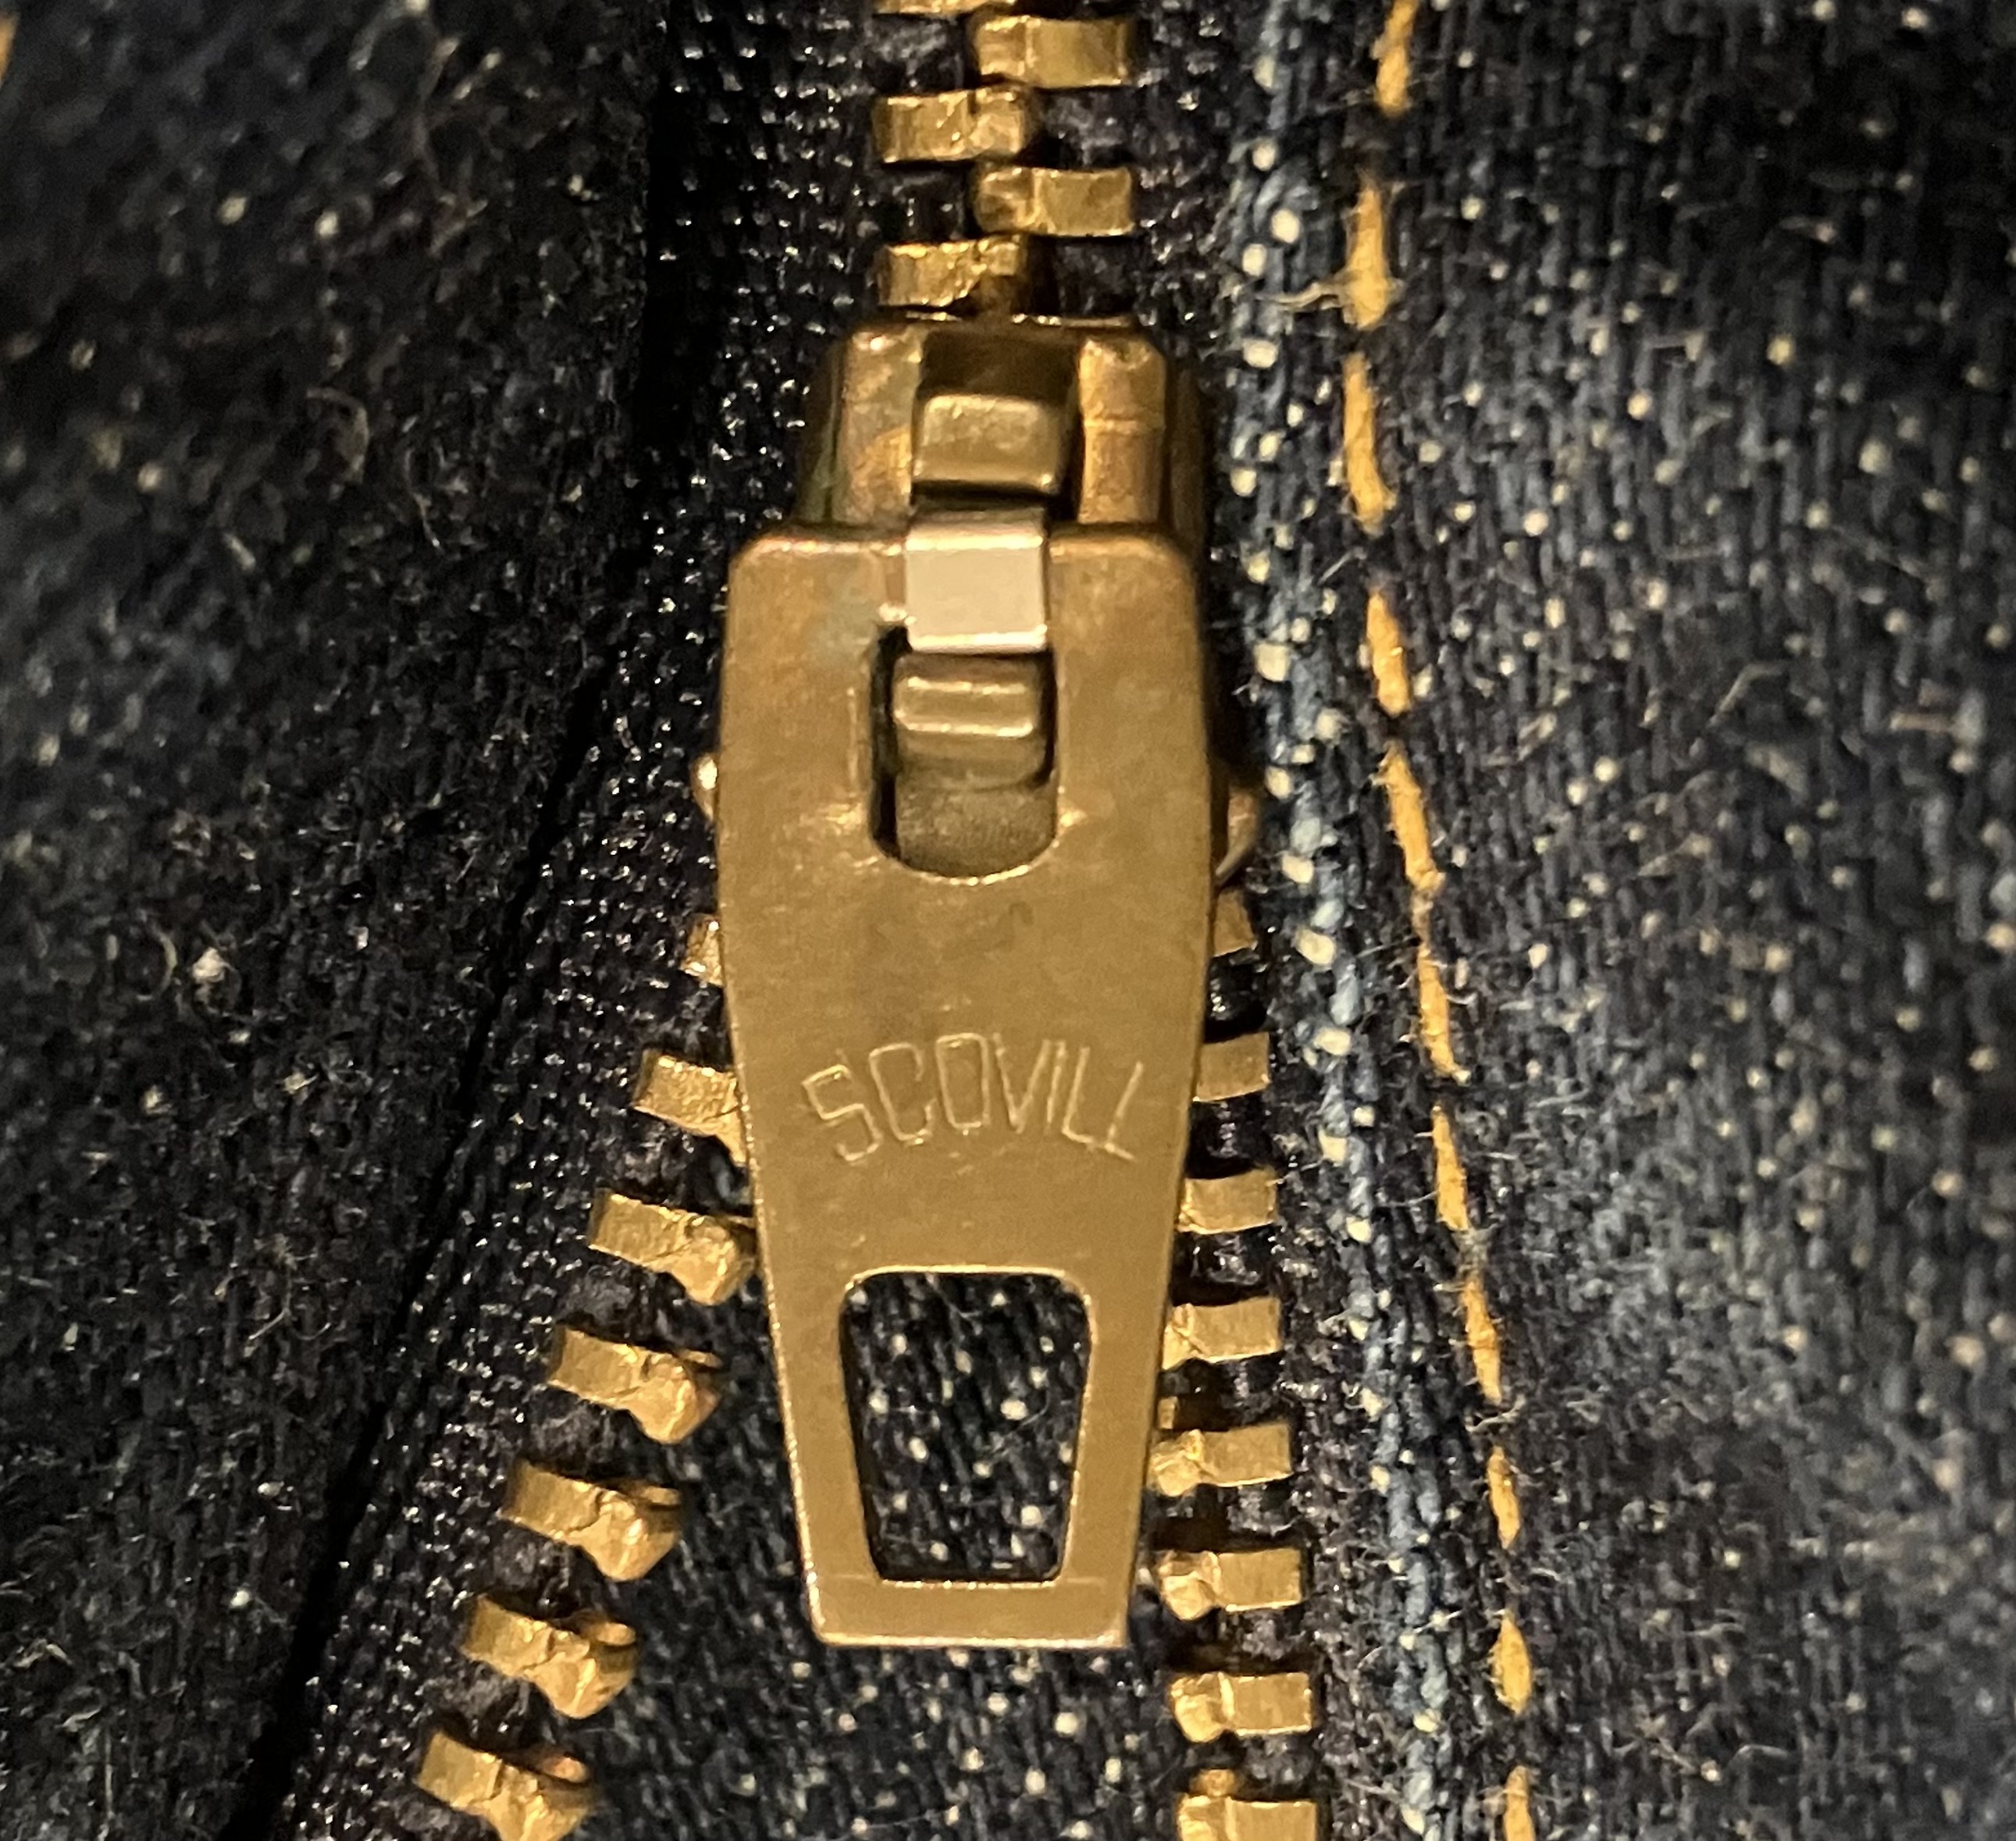
Zipper Stamp
Conmar→1940s, TALON 42→1950–60s, YKK→1970s+
📷 Hold phone light at 45 degrees to make the stamp stand out, then shoot close-up.
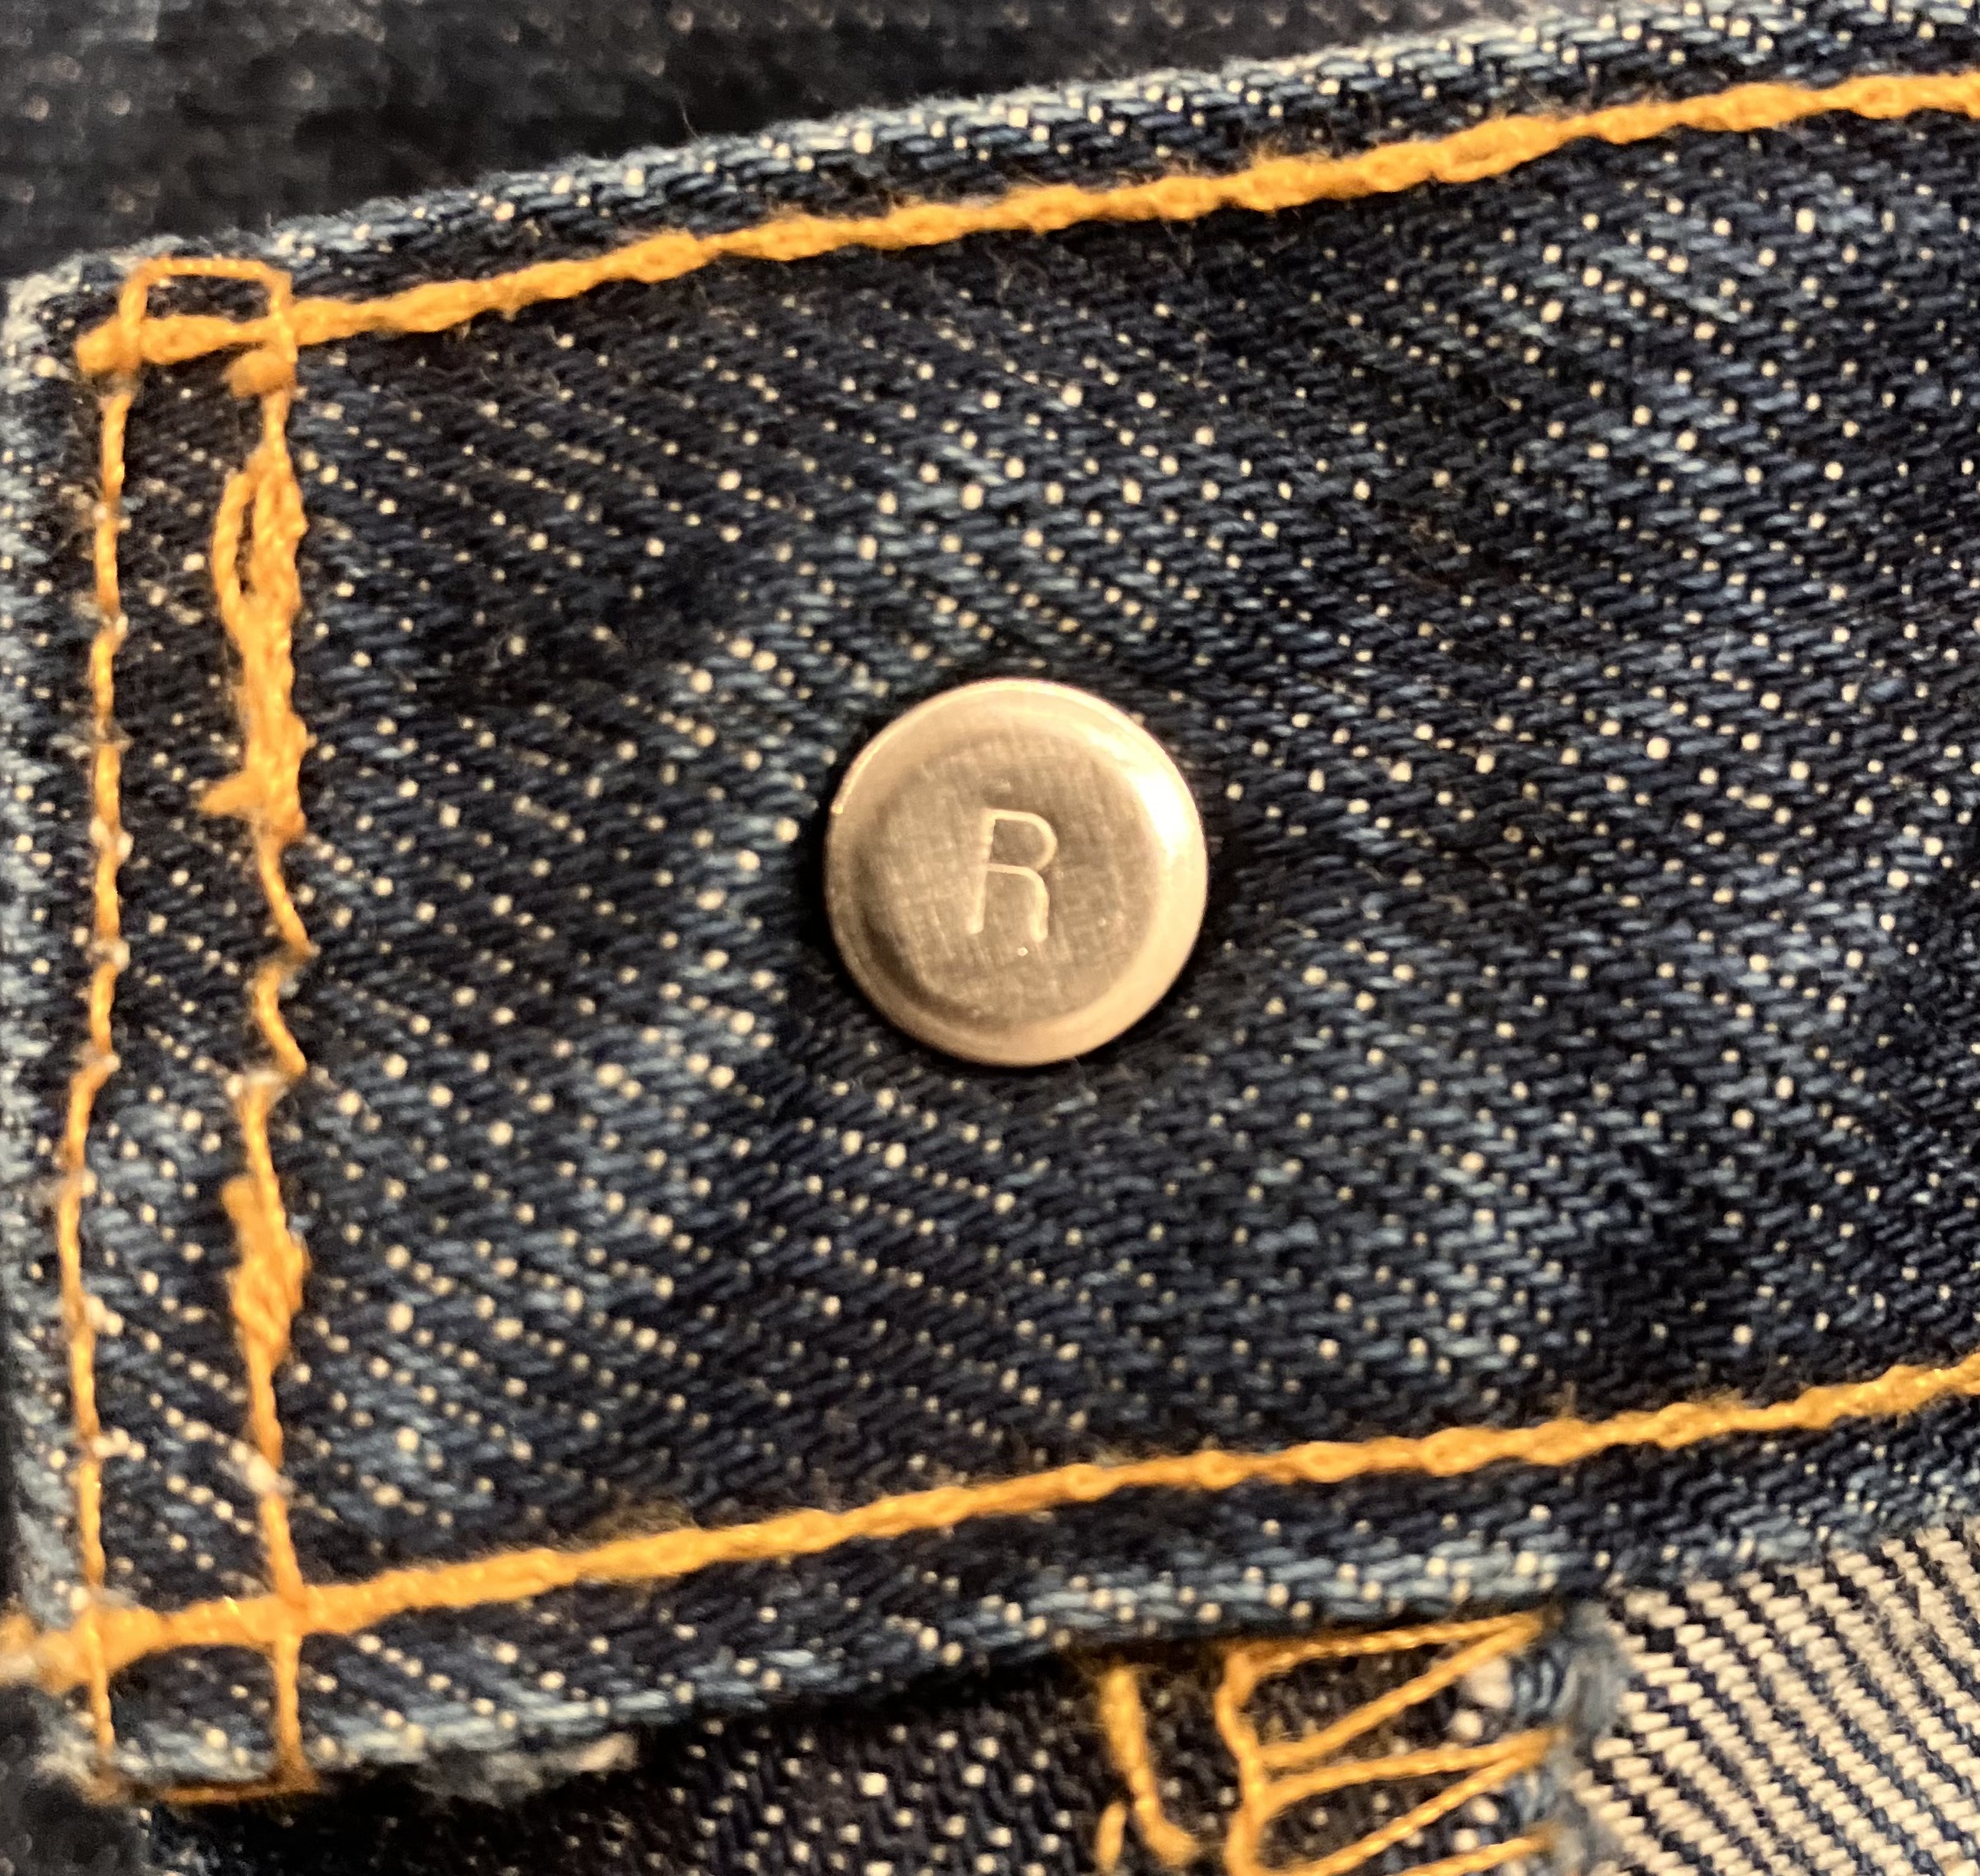
Button Back Stamp
Number = factory code. 1 or 2 = SF factory, highest rarity.
📷 Pull button from waistband, use angled light and macro mode. Check all buttons.
© Liface / Wikimedia Commons / CC BY-SA 3.0
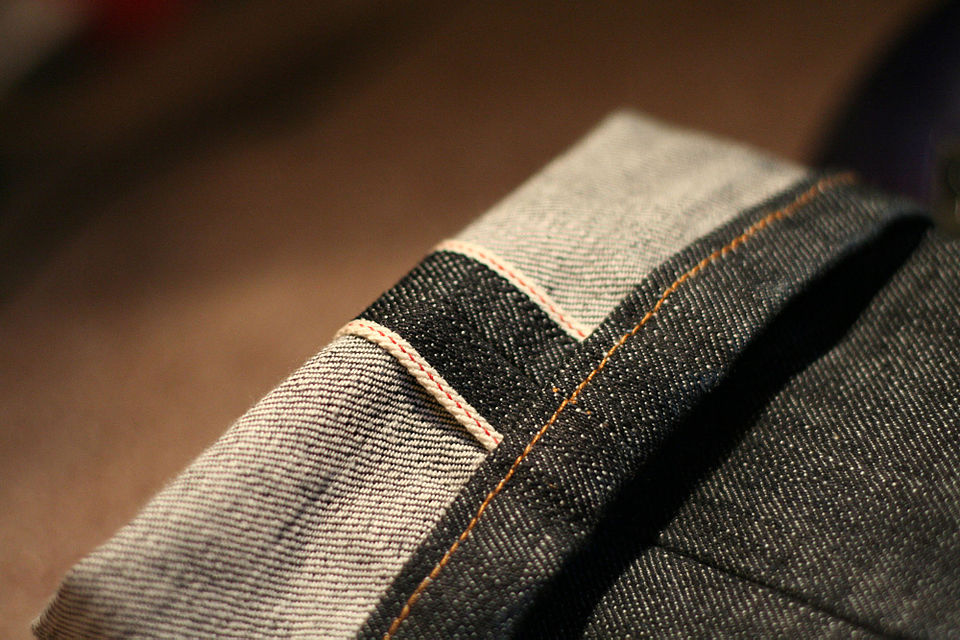
Selvedge
White selvedge edge = pre-1981 confirmed.
📷 Fold hem 3–4cm and shoot the inner edge. A red line confirms selvedge.
© carianoff / Wikimedia Commons / CC BY-SA 2.0
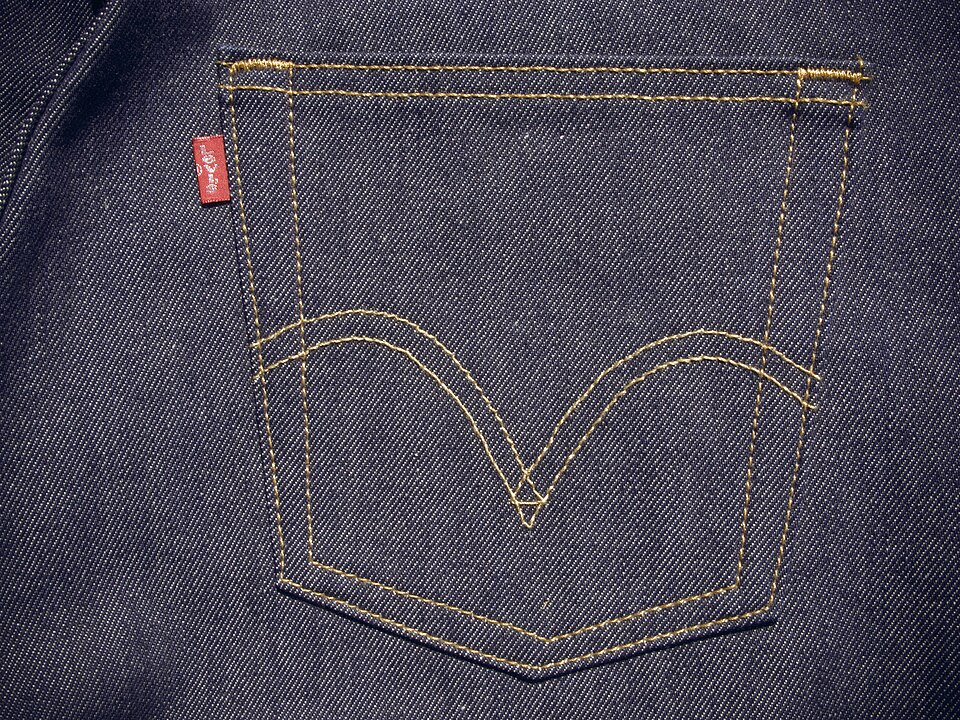
Back Pocket Stitching
Arcuate stitch thread color dates the piece. Yellow thread = pre-mid-1970s confirmed.
📷 Shoot the full pocket in natural light so thread color is clearly visible.
Back Patch
Leather patch = pre-1954 confirmed. Material and condition indicate era and value.
📷 Shoot straight-on so all text on the patch is readable.